True patient safety isn’t about noticing if a room is tidy; it’s about training your eye to see the invisible breaks in sterile protocol that lead to infection.
- A clinician’s hands can be ‘clean’ but still contaminate a sterile field if they touch a non-sterile surface, even for a second.
- Systemic issues, like understaffed wards, directly increase infection risk by creating cognitive overload that causes even diligent staff to miss critical aseptic steps.
Recommendation: Shift your focus from general cleanliness to observing the integrity of specific processes, such as dressing changes and instrument handling, to become an active partner in your own infection prevention.
As a patient, you are taught to look for signs of cleanliness: a tidy room, a provider who uses hand sanitizer. But these are merely the opening scene of a much more complex play. True infection control is not about what is visibly clean, but about maintaining an unbroken chain of asepsis—a series of precise, non-negotiable protocols. My experience as an infection control nurse has shown me that the most dangerous breaches are often silent and subtle, missed by the untrained eye. They happen in the split second a provider turns their back on a sterile field or uses the same pair of gloves to remove an old dressing and apply a new one.
The common advice to « speak up if you’re concerned » is insufficient if you don’t know what to look for. This guide is designed to change that. It is not about fostering mistrust, but about empowering you with expert knowledge. We will move beyond the basics of handwashing and delve into the critical details of sterile fields, instrument handling, and procedural integrity. By learning to recognize the specific moments where the chain of asepsis can break, you transform from a passive recipient of care into an active, informed guardian of your own safety. This is your guide to seeing what infection control professionals see.
This article will provide you with the specific observational skills needed to identify potential risks during your medical care. The following sections break down the key areas where aseptic breaches commonly occur, giving you actionable knowledge for each scenario.
Summary: How To Spot Breaches In Aseptic Technique At Your Doctor’s Office?
- Why Seeing Your Doctor Use Sanitizer Is Not Always Enough?
- How To Move Around A Sterile Field Without Contaminating It?
- Disposable or Autoclaved: Which Instruments Are Safer For Minor Procedures?
- The Daily Question You Must Ask To Prevent UTIs In The Hospital
- How To Change Dressings Without Introducing Bacteria?
- Why Understaffed Wards Increase Infection Risks By 40%?
- How To Care For The Biopsy Site To Avoid An Ugly Indentation?
- Why Your Clinical Nurse Is More Critical To Recovery Than The Surgeon?
Why Seeing Your Doctor Use Sanitizer Is Not Always Enough?
The sight of a clinician using hand sanitizer upon entering your room is reassuring, but it is only the first step in a multi-stage process. A common and dangerous assumption is that once hands are clean, they stay clean. The reality is that hand hygiene is required at multiple specific moments to prevent cross-contamination. Touching a computer keyboard, a doorknob, or even your own bedrail after sanitizing can immediately render hands non-sterile. The critical factor is not just *if* hand hygiene was performed, but *when*.
This concept is known as the « Five Moments for Hand Hygiene, » a globally recognized standard. A clinician’s compliance is measured by their adherence to all five moments, not just the most obvious one. For a patient, this means your observation must be more sophisticated. You are not just looking for the act of sanitizing, but for its timely execution before any aseptic task and after any potential contamination. A failure at any of these moments breaks the chain of asepsis and introduces risk, regardless of how clean the hands were initially.
Action plan: Key moments to observe for hand hygiene
- Before touching you: Watch if your doctor performs hand hygiene immediately before making physical contact, not just upon entering the room.
- Before a clean/aseptic procedure: Observe that hand hygiene occurs right before a sterile procedure begins, even if their hands were cleaned just moments earlier.
- After body fluid exposure risk: Verify hand hygiene happens immediately after any contact with body fluids and after removing gloves. This is a non-negotiable step.
- After touching you: Notice if the clinician cleans their hands upon leaving your side, after physical examination or assistance.
- After touching your surroundings: Check that hands are cleaned after touching any object in your immediate area (the « patient zone »), such as the bedside table or IV pole.
Therefore, your role as a vigilant patient is to upgrade your observation from a simple « did they wash? » to a more nuanced « did they wash at the correct time? ». This awareness of protocol integrity is your first line of defense.
How To Move Around A Sterile Field Without Contaminating It?
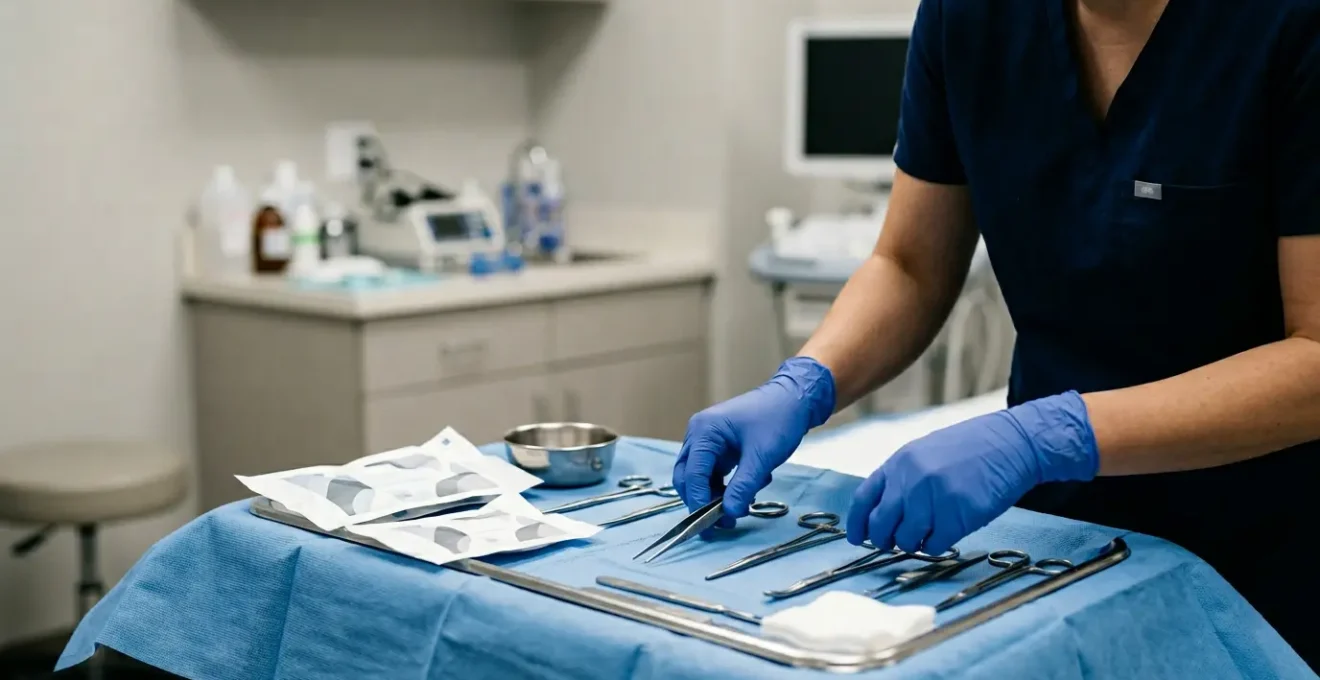
During many procedures, from a simple biopsy to a complex surgery, clinicians establish a « sterile field. » Think of it as an invisible, protected bubble created on a medical drape where only sterile items are allowed. The most common breach of this field is not a dramatic drop of a dirty instrument, but subtle, unintentional contact. The edge of a sleeve, a dangling ID badge, or even turning one’s back to the field can introduce contaminants.
A core principle of aseptic technique is to always face the sterile field and keep all non-sterile items away from it. This includes the clinician’s body. As a patient, you can observe the discipline of movement. Does the staff member turn their back to the instrument tray? Do they reach across the sterile field to grab something? Furthermore, minimizing conversation over the field is critical, as speaking creates airborne particles that can settle and contaminate surfaces. The sterile field has a defined boundary, typically a one-inch border around the edge of the drape that is considered non-sterile. Any item placed in this zone is contaminated.
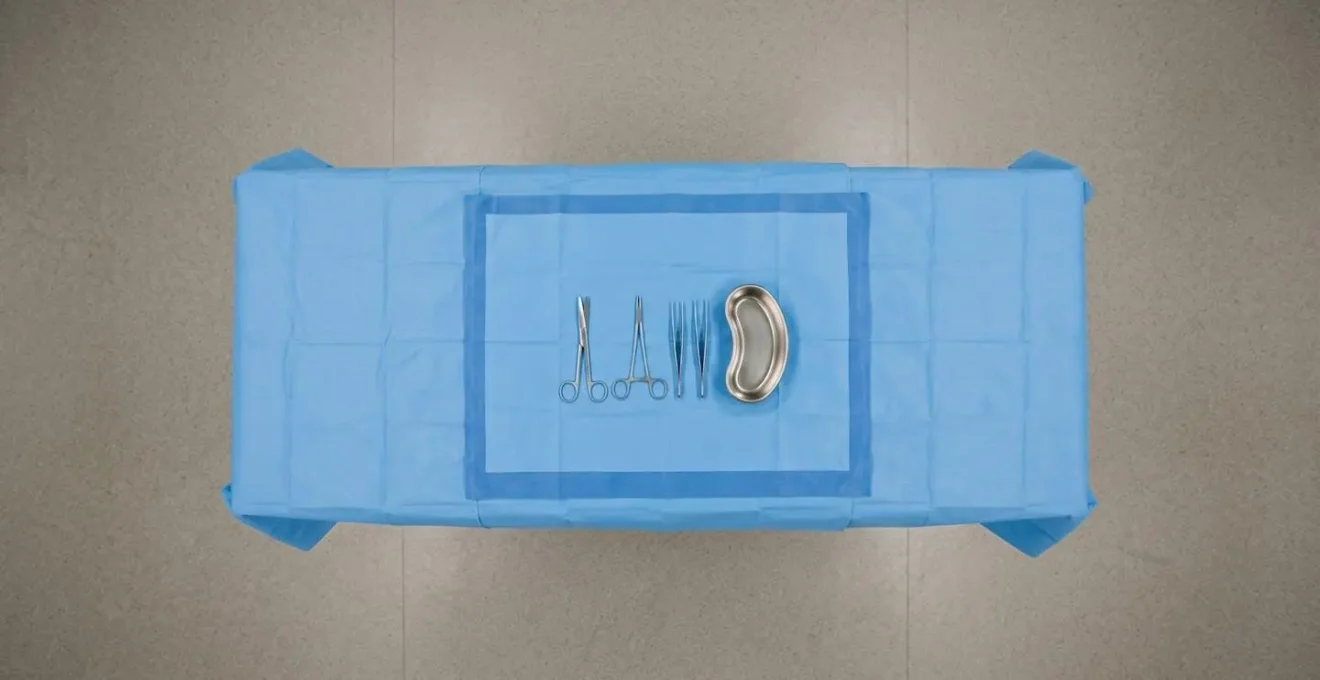
This image illustrates the concept of the sterile field boundary. The central blue area is the protected zone where sterile instruments must remain. The outer edge is the buffer. According to CDC guidelines on sterile field integrity, contamination occurs when any non-sterile item breaches these boundaries or when air turbulence is created by excessive movement. A disciplined team treats this boundary with absolute respect.
Your observation of spatial discipline—how the clinical team moves and interacts with this sterile bubble—is a powerful indicator of the overall commitment to aseptic technique.
Disposable or Autoclaved: Which Instruments Are Safer For Minor Procedures?
For any procedure involving an incision or puncture, the sterility of the instruments is non-negotiable. These instruments are generally prepared in one of two ways: they are single-use, disposable items that come pre-sterilized in sealed packaging, or they are reusable metal instruments that have been sterilized on-site in a machine called an autoclave. Both methods are safe when performed correctly, but each has distinct verification points you can observe.
For disposable instruments, your focus should be on the packaging. It must be factory-sealed, completely dry, and intact, with no tears, punctures, or signs of having been previously opened. The clinician should open the package in front of you. For autoclaved instruments, which are typically wrapped in special cloth or paper, look for an indicator strip or tape. This chemical indicator changes color (e.g., from white to black) to confirm the package has completed a sterilization cycle. The wrapping must be perfectly dry; any moisture or water stain (a « strike-through ») compromises sterility and means the instruments inside are considered contaminated.
The following table provides a checklist for verifying the sterility of both types of instruments, empowering you to be an active observer in the moments before your procedure begins.
| Verification Aspect | Autoclaved (Reusable) Instruments | Disposable (Single-Use) Instruments |
|---|---|---|
| Visual Indicator | Look for chemical indicator tape/strip that changes color (e.g., white to black stripes) showing sterilization cycle completion | Check that packaging is factory-sealed, dry, and intact with no tears or punctures |
| Packaging Integrity | Sterile wrap should be completely dry with no signs of water damage (strike-through) | Verify expiration date is clearly visible and not expired; packaging should not be damp |
| Opening Protocol | Should be opened using aseptic technique immediately before use; ask if it was sterilized on-site | Clinician should open the sealed package in front of you, demonstrating it was previously unopened |
| Red Flag | Any moisture on packaging, missing or unchanged indicator strip, packaging opened prior to procedure | Torn packaging, condensation inside package, faded printing suggesting old stock, pre-opened items |
Do not hesitate to ask, « Could you show me the indicator on that package? » A professional and confident team will welcome your engagement in the safety process.
The Daily Question You Must Ask To Prevent UTIs In The Hospital
Urinary catheters are a common and necessary medical device, but they are also a primary gateway for infection. Catheter-Associated Urinary Tract Infections (CAUTIs) are one of the most common healthcare-associated infections (HAIs). They are dangerous and largely preventable. The single most important factor in preventing CAUTIs is minimizing the duration the catheter remains in place. Every day a catheter stays in, the risk of infection increases.
As a patient or a patient’s advocate, your role is not to question the initial need for a catheter but to be a persistent, daily advocate for its removal. This doesn’t require a confrontation. A simple, collaborative question posed during the medical team’s daily rounds can make all the difference: « What is our goal today for removing the catheter? » This question signals your awareness, prompts the clinical team to reassess the catheter’s necessity against daily progress, and frames you as a partner in care. This simple query can prevent « catheter complacency, » where the device is left in place out of routine rather than strict medical need. Given that CAUTIs cause up to 13,000 annual deaths and hundreds of millions in healthcare costs, this daily question is one of the most powerful actions you can take for your safety.
In addition to advocating for removal, you can also perform « maintenance checks » on the device itself:
- Positioning: Is the drainage bag hanging below the level of your bladder? It should never rest on the floor or be raised above your waist, as this can cause backflow.
- Tubing: Is the tubing free of kinks or loops? Obstructed flow is a significant infection risk.
- Drainage: Is the bag being emptied regularly (at least every 8 hours or when two-thirds full)?
By linking your improving mobility (« If I can walk to the bathroom, can we remove it? ») to catheter discontinuation, you provide a clear, clinical reason to advance your care and reduce your infection risk.
How To Change Dressings Without Introducing Bacteria?
Changing a wound dressing seems like a simple task, but it is a high-risk moment for bacterial introduction. The most critical error in this procedure is a breach in glove-use protocol. Many assume that as long as a clinician is wearing gloves, the process is safe. However, the correct procedure requires a two-step gloving technique, and missing this step is a frequent and dangerous breach.
Here is the correct protocol: Phase 1 involves using a pair of clean, non-sterile gloves to remove the old, soiled dressing. That dressing, and the gloves used to touch it, are now contaminated. They must be disposed of properly. Phase 2 begins *after* the first pair of gloves is removed and hand hygiene is performed again. Only then should the clinician don a new pair of sterile (or clean, depending on the wound) gloves to handle and apply the fresh, sterile dressing. A common mistake is for a clinician to use a single pair of gloves for the entire process, effectively transferring bacteria from the old dressing directly onto the clean wound.
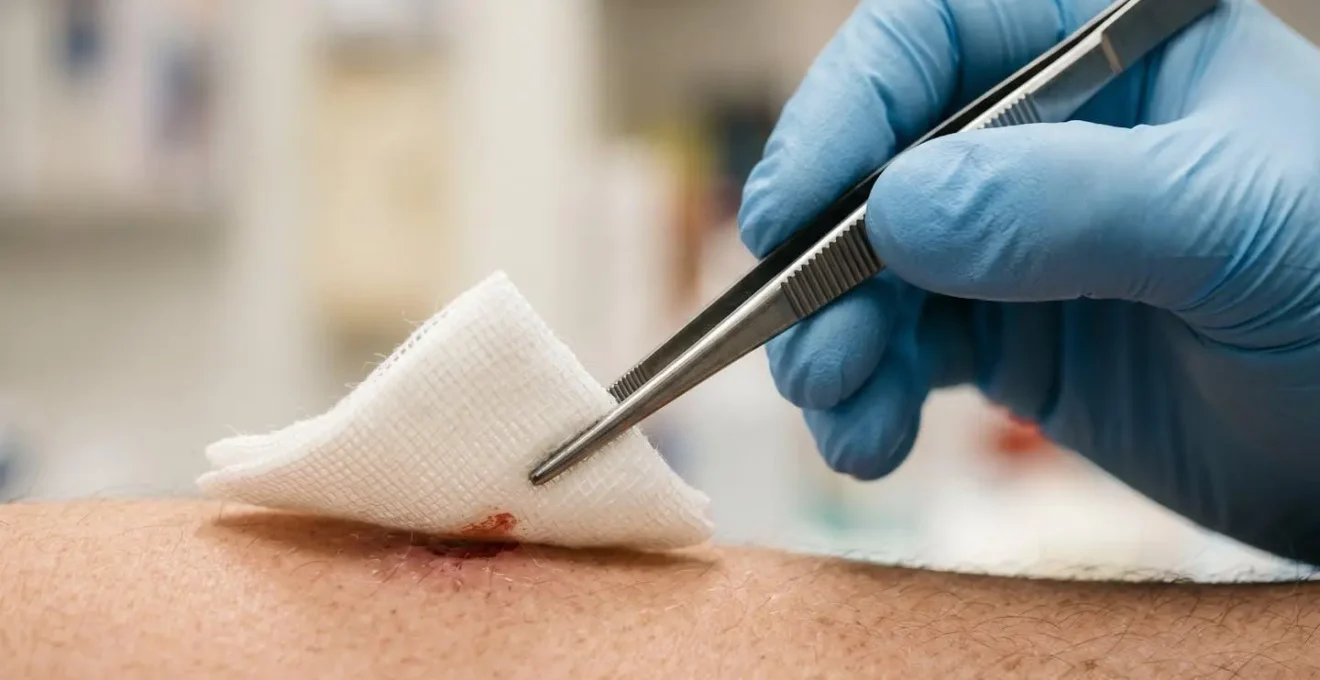
Another key principle is the « no-touch » technique, often facilitated by using sterile forceps to handle the new dressing, as shown above. This prevents even the new sterile gloves from making direct contact with the part of the dressing that will cover the wound. As an observer, your focus should be on this sequence: Old dressing off, gloves off, hands cleaned, new gloves on, new dressing on. If you see a clinician move from touching the old dressing to the new one without this complete reset, the chain of asepsis has been broken.
This is a clear, observable process. Watching for the glove change is a simple yet powerful way to ensure your wound is being cared for safely.
Why Understaffed Wards Increase Infection Risks By 40%?
One of the most significant, yet least visible, factors influencing infection rates is hospital staffing levels. When nursing staff are stretched thin, their time and attention are divided across too many patients. This is not a matter of care or diligence, but of simple human bandwidth. Aseptic technique requires focus and a methodical approach, two things that are casualties of high cognitive load. When a nurse is juggling multiple urgent tasks, the risk of a small procedural error—like forgetting a hand hygiene moment or rushing a dressing change—increases dramatically.
Research provides stark evidence for this connection. It is not a theoretical concern. For example, a major study demonstrated that patients on hospital units with registered nurse understaffing face a 15% higher risk of healthcare-associated infections. The impact is direct and measurable. When nurses have an unsafe patient load, they are forced into a state of continuous triage where preventative tasks, which are meticulously procedural, can get deferred or rushed in favor of more immediate, life-sustaining interventions.
When nurses are stretched thin, they don’t miss steps due to lack of care, but because their mental bandwidth is maxed out. Aseptic steps are a common casualty of this cognitive overload.
– Healthcare Personnel Hand Hygiene Compliance Study, Current Infectious Disease Reports
While you as a patient cannot directly control hospital staffing ratios, you can be aware of the environment. A chaotic, rushed ward is a high-risk environment. In such situations, your personal vigilance and active participation in your care protocols become even more critical. It is a systemic problem that has direct consequences at your bedside.
This understanding shifts the focus from blaming individuals to recognizing the systemic pressures that create the conditions for error, reinforcing the need for your role as a final safety check.
How To Care For The Biopsy Site To Avoid An Ugly Indentation?
After a skin biopsy, the focus is rightly on preventing infection, but a common secondary concern is the long-term cosmetic outcome, specifically preventing a depressed or indented scar. Proper aftercare is crucial for both safety and aesthetics. An indentation often forms not from the biopsy itself, but from a complication during healing, such as a hematoma (a collection of blood under the skin) or excessive tension on the wound.
Your first 24-48 hours of care are critical. The pressure dressing applied after the procedure is not just for absorbing blood; its primary purpose is to prevent a hematoma from forming. Keep this dressing on for the full recommended time. When you are cleared to remove it, cleanse the area gently as instructed, typically with mild soap and water. Do not scrub. Pat it dry with a clean cloth—do not rub. The goal is to keep the site clean and dry. Applying an antibiotic ointment and a new bandage creates a moist environment that can be conducive to healing, but you must follow your doctor’s specific instructions.
During the healing process, which can take several weeks, you must watch for signs of infection, which can damage the underlying tissue and worsen scarring. These signs include: increasing redness that spreads away from the wound, yellow or greenish pus, worsening pain, or a foul odor. It’s also vital to avoid tension on the area. If the biopsy was on a joint or a part of the body that moves a lot, try to limit strenuous activity that could pull the wound edges apart. This tension is a major contributor to wider, more noticeable scars.
By diligently managing pressure, cleanliness, and tension, you give your body the best possible chance to heal cleanly, minimizing the risk of both infection and an undesirable cosmetic result.
Key takeaways
- True safety is not visible cleanliness, but the integrity of unseen sterile protocols.
- Every patient can learn to spot critical breaches in hand hygiene, sterile field management, and instrument handling.
- Systemic factors like understaffing directly impact your safety, making your active surveillance even more vital.
Why Your Clinical Nurse Is More Critical To Recovery Than The Surgeon?
The surgeon performs the critical, high-intensity intervention, but it is the clinical nurse who manages your recovery and stands as the primary guardian of your safety in the hours and days that follow. Recovery is a marathon, not a sprint, and the nurse is the one ensuring you cross the finish line without a preventable complication like a healthcare-associated infection. They are the frontline executors and supervisors of the very aseptic protocols discussed throughout this guide.
A nurse’s role extends far beyond administering medication. They are responsible for active infection surveillance: managing wound dressings, maintaining IV and catheter lines, ensuring proper hygiene, and educating you on your role in recovery. A study on infection control practices found that nurses with adequate patient loads were significantly more likely to complete all infection control tasks, educate patients effectively, and communicate risks to the broader medical team. Their constant presence at the bedside makes them the most important link in the chain of asepsis.
The surgeon’s work can be undone in an instant by a poorly managed IV line or a contaminated dressing change. The clinical nurse is the professional who prevents this from happening. They are the ones who translate the hospital’s infection control policies into direct action at your bedside. They manage your environment, your devices, and your recovery trajectory with a constant focus on preventing harm.
Therefore, building a collaborative relationship with your nurse and engaging with them about your care plan is the single most effective step you can take. They are not just a caregiver; they are your most critical ally in achieving a safe and complete recovery.