The choice between a 1.5T and 3T MRI scanner can be a source of anxiety, often framed as a simple question of power. However, the decision is a clinical trade-off. This guide, from a technician’s perspective, demystifies the technology, explaining that the ‘best’ scan isn’t about the strongest magnet but about using the right tool for the specific diagnostic question, balancing superior image detail against factors like patient safety, comfort, and the potential for image artifacts.
Your doctor has recommended an MRI, and suddenly you’re faced with technical jargon: « We’re scheduling you for a 3T scan, » or perhaps a « 1.5T. » For many patients, this is the first point of confusion and anxiety. The immediate assumption is that a bigger number must be better. The common wisdom suggests that a 3T (Tesla) magnet, being twice as powerful as a 1.5T, will automatically provide a superior result. While this is true in terms of raw signal, this simple view misses the bigger picture entirely.
But what if the ‘best’ scanner isn’t about raw power, but about the right tool for the job? What if the real factors are a complex balance of diagnostic need, patient safety, and your ability to get through the scan calmly? The truth is, a 3T scanner’s higher resolution is only beneficial if the images are clear and artifact-free, and that depends heavily on you, the patient. An ultra-high-definition scan ruined by a slight tremor is less valuable than a good-quality scan where you remained perfectly still.
As an MRI technologist, my goal is to help you understand this trade-off. This guide will move beyond the simple « stronger is better » narrative. We will explore the tangible differences these scanners have on your experience—from the noise and the feeling of confinement to critical safety checks for implants. We’ll discuss when the extra detail of a 3T is truly necessary and how you can prepare to ensure the best possible diagnostic outcome, regardless of the machine. This is about empowering you with knowledge to turn anxiety into active participation in your own diagnostic journey.
To navigate this complex topic, we’ve broken down the key differences and patient-centric considerations. The following sections will guide you through everything you need to know, from managing the in-scanner experience to understanding the crucial role your radiologist plays behind the scenes.
Summary: 3T vs 1.5T MRI: When Is High-Resolution Scanning Strictly Necessary?
- How To Survive The Tighter Bore Of A High-Res Scanner?
- The Heating Risk: Why Your Old Implant Might Not Be Safe In A 3T Scanner?
- Why Are High-Res Scanners Louder Than Jet Engines?
- Dye or No Dye: When Does Contrast Actually Change The Diagnosis?
- The « Motion Artifact » Problem That Ruins High-Res Images
- CT Scan or MRI: Which Is Safer For Soft Tissue Injuries?
- How To Control Panic Attacks While Sedated But Awake?
- Why The Radiologist Is The Most Important Doctor You Never Meet?
How To Survive The Tighter Bore Of A High-Res Scanner?
One of the first things patients notice about many 3T scanners is that the « bore »—the tunnel you lie in—can feel slightly more restrictive than older 1.5T models. This isn’t just a feeling; it’s a matter of physics. Achieving a stronger, more uniform magnetic field often requires a more compact design. For patients with claustrophobia, this can be a significant source of anxiety before the scan even begins. It’s a very real concern, and as technologists, we are highly trained to help you manage it.
It’s important to contextualize this fear. While anxiety is common, actual incomplete examinations due to claustrophobia are statistically very low. The key to a successful scan is preparation and communication. You are never « trapped. » You will have a panic button and be in constant communication with your technologist. The view from inside the scanner, while confined, always has a clear point of reference to the open room, which can serve as a mental anchor.
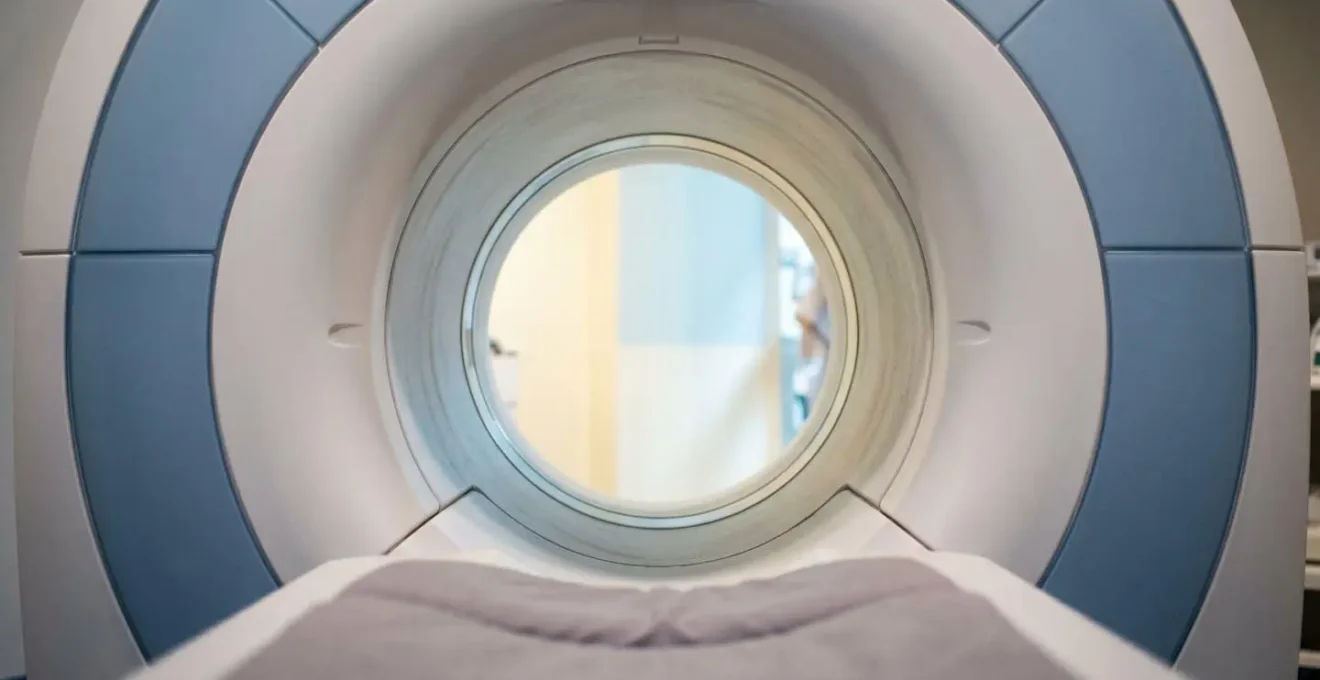
As this perspective shows, the focus is on the light at the end of the tunnel. To feel empowered rather than enclosed, you can take control of the situation before you even enter the machine. Asking the right questions can transform your experience from a passive ordeal to an active partnership. Here are some key questions to ask your technologist:
- Where exactly is the panic button and how do I use it?
- How often will you be speaking to me over the intercom?
- Is a prism mirror available so I can see outside the scanner?
- Can you give me a rough idea of how long each imaging sequence will last?
- What is the protocol if I signal that I am in distress?
The Heating Risk: Why Your Old Implant Might Not Be Safe In A 3T Scanner?
Beyond claustrophobia, the most critical safety consideration with a 3T MRI is the potential risk to patients with implanted medical devices. This isn’t about the magnetic pull on the device itself—which is a primary screening concern—but about a more subtle danger: radiofrequency (RF) heating. During a scan, RF pulses are used to create the images. This energy can be absorbed by conductive materials, like the wires or components of an implant, causing them to heat up.
The strength of the magnetic field directly impacts this risk. The energy absorption rate, known as the Specific Absorption Rate (SAR), can be up to four times higher in a 3T scanner compared to a 1.5T. For a patient with a modern « MR Conditional » implant, this is usually not a problem, as the device has been tested and proven safe under specific 3T conditions. However, for older implants, or those only approved for 1.5T, entering a 3T scanner could cause significant and dangerous heating of the tissue surrounding the implant. This is why your implant history is the single most important piece of information you can provide to the imaging team.
Verifying your implant’s safety is a non-negotiable step. It is your responsibility, along with your medical team, to ensure compatibility before your appointment. A simple « I have a pacemaker » is not enough; we need the specific make and model to check against a comprehensive database.
Your Implant Safety Verification Checklist
- Locate your implant card or documentation containing the manufacturer name, device model number, and serial number.
- Visit a verification database like mrisafety.com and use the search function to look up your specific implant by manufacturer and model.
- Verify the ‘MR Conditional’ status and note the specific field strength limitations (e.g., 1.5T only vs. 1.5T and 3T compatible).
- Check for any additional conditions such as maximum scan time restrictions, specific body regions to avoid, or SAR limits.
- Provide all this verified information to your imaging facility well in advance of your scan, and if documentation is missing, contact your surgeon’s office or the device manufacturer to obtain the necessary records.
Why Are High-Res Scanners Louder Than Jet Engines?
If you’ve had an MRI before, you know the noise is intense. Patients often describe it as a series of loud banging, clanging, and buzzing sounds, sometimes compared to a construction site or even a jet engine. This acoustic noise is not a sign of a malfunction; it is a normal, albeit jarring, byproduct of how MRI works. And in a 3T scanner, that noise is almost always significantly louder than in a 1.5T machine.
The sound originates from the gradient coils, which are powerful electromagnets that are switched on and off thousands of times per second. This rapid switching creates micro-vibrations in the hardware. When these vibrations are conducted through the main magnetic field, the immense forces at play amplify them into the loud noises you hear. The stronger the main magnetic field (3T vs. 1.5T) and the faster the gradient coils are switched for high-resolution imaging, the greater the force and the louder the resulting noise.
From a technician’s standpoint, managing this noise is a key part of patient care. We will always provide you with hearing protection, which is mandatory for your safety. This typically includes earplugs, headphones, or both. Often, you can listen to music through the headphones, which serves two purposes: it helps to drown out the scanner noise and provides a welcome distraction, making the time pass more quickly. Understanding that the noise is a normal part of the process can help reduce anxiety. Instead of a random, alarming racket, you can reframe it as the sound of the machine working hard to capture the detailed images your doctor needs.
Dye or No Dye: When Does Contrast Actually Change The Diagnosis?
Another common source of patient questions revolves around the use of « dye, » more accurately known as a gadolinium-based contrast agent (GBCA). Not every MRI requires contrast, and the decision to use it is made by the radiologist based on the specific clinical question. A higher-field 3T scanner does not automatically mean you will need contrast; the choice is based on pathology, not physics.
So, when is it necessary? Contrast agents work by changing the magnetic properties of nearby water molecules. This causes certain tissues to « light up » or enhance on the scan, making them stand out. This is indispensable for specific diagnostic tasks. For example, contrast is crucial for:
- Identifying tumors: Most tumors have a different blood supply than normal tissue and will enhance brightly after a contrast injection, revealing their size, shape, and extent.
- Assessing inflammation or infection: Active inflammation, such as in multiple sclerosis plaques or in an infected joint, will show enhancement.
- Visualizing blood vessels: An MR angiogram with contrast can clearly map arteries and veins to look for blockages or aneurysms.
Conversely, many conditions are perfectly visible without it. A standard knee MRI to look for a meniscal tear or a ligament rupture typically does not require contrast, as the high soft-tissue resolution of MRI (especially 3T) can delineate these structures clearly. The decision is always a risk/benefit analysis performed by the radiologist to maximize the diagnostic yield while minimizing any potential patient risk.

The administration of contrast is a precise medical procedure. While GBCAs are generally very safe, they are not used indiscriminately. Your kidney function will be assessed beforehand, as the agent is cleared from the body through the kidneys. The decision to use it is a targeted one, aimed at answering a question that a non-contrast scan could not.
The « Motion Artifact » Problem That Ruins High-Res Images
The single greatest enemy of a high-quality MRI scan is movement. Even the slightest motion—a cough, a swallow, a twitch, or simple fidgeting—can create what we call a motion artifact. This appears as blurring, ghosting, or streaking across the image, potentially rendering it non-diagnostic. This problem is significantly magnified in high-resolution 3T scanning for two main reasons: longer scan times and higher sensitivity.
To achieve the fine detail that a 3T scanner is capable of, the imaging sequences are often longer than on a 1.5T machine. Holding perfectly still for a 3-minute sequence is challenging; holding perfectly still for a 7-minute sequence is exponentially harder. Furthermore, the high resolution that can spot a tiny cartilage tear is also sensitive enough to register the tiny motion of a muscle tremor. A retrospective evaluation found that motion artifacts are present in up to 20% of completed MRI examinations, representing a significant cause of repeated scans and diagnostic uncertainty.
As a patient, your ability to remain still is your most important contribution to the scan’s success. This goes beyond just conscious movement. Involuntary movements, like breathing or bowel peristalsis, can also create artifacts. Fortunately, you can take steps to minimize this before you even arrive.
- For 24 hours before an abdominal or pelvic MRI, avoid gas-producing foods like beans, broccoli, and carbonated drinks.
- Eliminate caffeine for at least 6 hours before a brain or cardiac scan to reduce tremor and heart rate.
- Empty your bladder immediately before the scan begins.
- Inform the technologist if you know you moved. It’s often possible to repeat one short sequence rather than the entire exam.
- Ask about motion-correction technology; many modern scanners have software that can help compensate for minor movement.
CT Scan or MRI: Which Is Safer For Soft Tissue Injuries?
When you have an injury, particularly to a joint or muscle, you might wonder why your doctor ordered an MRI instead of a CT scan, or vice-versa. While both are advanced imaging tools, they operate on completely different principles and are suited for different tasks. For soft tissue injuries—involving ligaments, tendons, cartilage, and muscles—MRI is the undisputed gold standard. The primary reason comes down to two factors: superior soft tissue contrast and the absence of ionizing radiation.
A CT (Computed Tomography) scan uses a series of X-rays to create cross-sectional images. It is incredibly fast and provides exquisite detail of bone, making it the preferred tool in emergency trauma situations to quickly rule out fractures. However, it uses ionizing radiation, and its ability to differentiate between different types of soft tissue is limited. On a CT, a tendon and a ligament can look very similar.
An MRI, on the other hand, uses no radiation. It uses a magnetic field and radio waves to generate images. Its greatest strength is its unparalleled ability to show subtle differences between various soft tissues. An MRI can clearly show a tear in a knee ligament, inflammation in a shoulder tendon, or a cartilage defect in a hip, details that are often invisible on a CT scan. The trade-off is that MRI scans are significantly slower, making them more susceptible to motion artifacts and less ideal for unstable trauma patients. The following table breaks down the key differences for assessing soft tissue injuries.
| Criterion | CT Scan | MRI (1.5T/3T) |
|---|---|---|
| Soft Tissue Contrast Resolution | Limited – poor differentiation between tendon, ligament, muscle | Superior – excellent differentiation of all soft tissue structures |
| Bone Detail | Excellent – ideal for complex fractures | Good but secondary to CT for cortical bone assessment |
| Radiation Exposure | Yes – approximately 2-10 mSv depending on region | None – uses magnetic fields and radiofrequency |
| Scan Speed (Emergency) | Very fast (1-5 minutes) – preferred for acute trauma | Slower (15-60 minutes) – motion artifacts possible |
| Best Clinical Use for Soft Tissue Injury | Initial trauma assessment, ruling out fracture | Definitive diagnosis of cartilage tears, ligament ruptures, muscle injuries |
| Life Support Compatibility | Compatible with most equipment | Incompatible with many devices – limits emergency use |
How To Control Panic Attacks While Sedated But Awake?
For some patients, particularly those with severe claustrophobia, a scan may be performed under « conscious sedation. » This involves medication to help you relax, but you remain awake and aware. This can create a strange and challenging mental state: your body is calm, but your mind is still fully conscious of being in a confined, noisy environment. It’s not uncommon for panic to begin to surface even through the haze of sedation.
You are not alone in this feeling. In fact, research on first-time MRI patients found that up to 25% of first-time MRI patients experience moderate to severe anxiety. When you’re sedated, you can’t simply will the panic away. The key is not to fight the feeling, but to redirect your focus using tangible, sensory-based « grounding » techniques. The goal is to anchor your mind to a controllable sensation or thought, pulling your attention away from the feeling of confinement.
As a technologist, I’ve seen patients use these simple but powerful mental exercises to get through even the longest and most challenging scans. The scanner environment itself provides several sensory anchors you can use:
- Focus on the Fan: Concentrate on the physical sensation of the cool air from the bore fan blowing on your face or skin. Treat it as a constant, reassuring presence.
- Count the Rhythms: The scanner noise isn’t random. It’s a series of distinct patterns and rhythms. Try to count them, turning the overwhelming sound into a measurable, predictable element.
- Practice a Body Scan: Mentally trace the outline of the blanket or padding where it touches your body. Start at your toes and slowly move your focus up to your head, noting each point of contact.
- Use a Mental Anchor: Before the scan, choose a detailed, positive memory (a favorite beach, a walk in the woods). During the scan, mentally « walk » through that memory, engaging all your senses—what did you see, hear, smell, and feel?
- Focus on Music: If you’re listening to music, don’t just let it be background noise. Actively focus on identifying the different instruments or trying to catch every word of the lyrics.
Key Takeaways
- The choice between 1.5T and 3T MRI is a clinical trade-off: 3T offers superior detail for specific neurological or joint issues but comes with challenges like increased noise and implant safety concerns.
- Patient preparation is as crucial as the technology. Your ability to remain still, manage anxiety, and provide accurate implant information directly impacts the diagnostic quality of the scan.
- The radiologist is the expert who tailors the scan. They choose the appropriate scanner and customize the imaging protocol specifically to answer your doctor’s clinical question.
Why The Radiologist Is The Most Important Doctor You Never Meet?
In the entire MRI process, patients interact with schedulers, nurses, and technologists. The one person they almost never meet is arguably the most important: the radiologist. There’s a common misconception that the choice between a 1.5T and 3T scanner is made by the referring physician or is based simply on what machine is available. In a high-quality imaging center, this is rarely the case. The decision is a critical diagnostic choice made by the radiologist.
The radiologist is the specialist physician who interprets your images, but their job starts long before that. They act as a consultant to your doctor, ensuring the correct test is performed in the correct way. They review your clinical history and the specific question your doctor is trying to answer, and then they « protocol » the scan. This means they are the ones who decide whether the superior signal-to-noise ratio of a 3T scanner is necessary to see the tiny nerve or cartilage detail required, or if a 1.5T will provide an excellent diagnostic image with fewer potential artifacts and greater patient comfort.
Case Study: The Radiologist’s Protocol Customization
As this breakdown of the radiologist’s protocol customization process illustrates, the pre-scan decision-making is critical. A radiologist reviews the clinical indication for each patient. If the goal is high-resolution neurological imaging or detecting tiny cartilage tears, the 3T system is selected for its superior detail. However, if a patient has certain implants or requires general abdominal imaging where artifacts can be more problematic at a higher field strength, the 1.5T is chosen. The radiologist then goes a step further, customizing the specific imaging parameters and contrast protocols to create a personalized examination tailored to answer the referring physician’s question.
This behind-the-scenes process is the heart of personalized diagnostic imaging. It’s not about using the most powerful machine; it’s about using the smartest approach. Understanding that an expert physician is meticulously planning your scan should provide immense reassurance. The technology is just a tool; the radiologist is the expert craftsman ensuring it’s used effectively to find the answers you and your doctor need.
Armed with this understanding, you are now better prepared to have a conversation with your healthcare team. The next step is to use this knowledge to ask informed questions and actively participate in your diagnostic journey, transforming you from a passive patient into a knowledgeable partner in your own care.